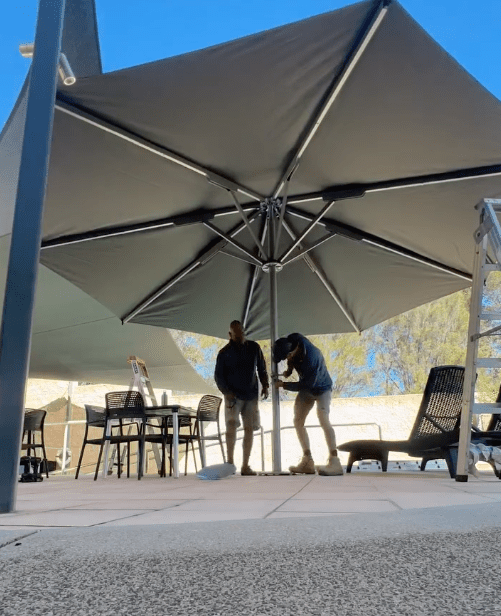
Most residential shade sail installations take one to two days from start to finish, including planning, setting posts (if needed), and tensioning the sail. A straightforward install onto existing structures might be done in a single afternoon. A larger custom sail with new concrete footings usually needs a second day, since footings have to cure before they can take any real load.
That’s the short answer. Here’s the full process, so you know exactly what’s involved before you pick up a drill or call in a professional.
What Is a Shade Sail and How Does It Work?
A shade sail is a tensioned piece of fabric, stretched between three or more fixing points, that blocks UV rays and heat while letting air move freely underneath. Unlike a solid roof, it relies on tension (not rigid framing) to hold its shape and shed wind and rain.
Types of Shade Sails (Triangle, Square, Rectangle, Custom)
- Triangle sails are the most common for driveways and small patios. Fewer anchor points mean simpler installation.
- Square and rectangle sails need four fixing points and usually a bit more attention to tension balance, since all four corners need to work together.
- Custom shapes suit awkward yards, pool areas, or commercial spaces where a standard shape won’t fit. These take more planning up front but give the best coverage for the space.
Key Components (Fabric, D-Rings, Turnbuckles, Hardware)
Every sail relies on the same basic hardware chain:
- Fabric with reinforced, stitched corners
- D-rings sewn or webbed into each corner
- Turnbuckles to fine-tune tension after installation
- Wire rope or cable (on larger sails) to spread load across the corner
- Snap hooks or shackles connecting the sail to the anchor point
If you’re comparing fabric options before you buy, it’s worth reading up on the best shade sail fabric types first, since fabric weight and weave affect how much tension the hardware needs to handle.
Pre-Installation Planning
Good planning prevents most of the problems people run into later. Rushing this stage is the number one reason DIY installs fail.
Choosing the Right Location and Layout
Walk the area at different times of day and note where the sun actually falls, not just where you assume it does. Think about:
- Which direction gets the harshest afternoon sun (usually west on the Sunshine Coast)
- Clearance from trees, gutters, and power lines
- Foot traffic and any structures the sail needs to clear (cars, pool fencing, doorways)
Calculating Sail Size, Angles, and Tension Points
Sails need a slope of at least 15 to 30 degrees between the highest and lowest fixing points. This slope lets rain run off instead of pooling, which stresses the fabric and hardware. If you’re unsure how to translate your yard’s dimensions into a workable shape, a shade sail sizing guide can help you work out proportions before you commit to post positions.
Checking Local Codes, Permits, and HOA Rules
Depending on the size, height, and location of your sail, Queensland councils may require approval. Rules vary by council and by whether the structure is attached to a dwelling. Check the specifics in our guides on council approval for shade sails in QLD and local council approval across Australia before you dig a single hole.
Sun and Wind Direction Considerations
Sunshine Coast properties deal with strong coastal winds as well as harsh UV. Orient the sail so its lowest point faces the prevailing wind direction where possible, and make sure every anchor point (post, wall, or fascia) can handle real wind load, not just the weight of the fabric itself.
Tools and Materials Needed
Having the right gear on hand before you start saves a lot of back-and-forth trips to the hardware store.
Essential Hardware (Turnbuckles, Eye Bolts, Wire Rope, Snap Hooks)
- Marine-grade turnbuckles (stainless steel, rated for outdoor use)
- Eye bolts or eye plates matched to your anchor type (post, wall, or fascia)
- Wire rope and rope clamps for larger sails
- Stainless snap hooks or shackles
- Concrete mix (if setting new posts)
Recommended Tools (Drill, Level, Post Hole Digger, Concrete Mix)
- Post hole digger or auger
- Spirit level and string line
- Cordless drill with masonry and metal bits
- Socket set or spanner for turnbuckles
- Tape measure and marking paint or pegs
- Ladder or scaffold, depending on height
Step-by-Step Shade Sail Installation Process
This is the sequence that gives you the most consistent, secure result.
Step 1: Mark Anchor Points and Post Locations
Use pegs and string lines to mark exactly where each corner will sit. Double-check diagonal measurements match on square or rectangle layouts, since even small errors compound once the fabric is under tension.
Step 2: Set Posts or Confirm Wall/Structure Anchors
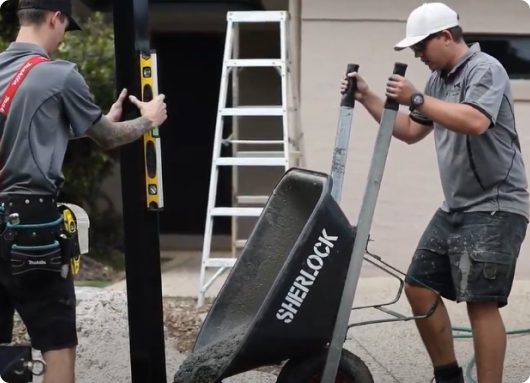
If you’re using posts, dig footings, set the posts plumb, and pour concrete. Let it cure fully (at least 48 to 72 hours) before applying any load. If you’re anchoring to a wall or existing structure, confirm the timber, masonry, or steel behind the fixing point is solid enough to take ongoing tension.
Step 3: Install Mounting Hardware (Eye Bolts, D-Rings)
Fit eye bolts or plates at each anchor point, angled in the direction the cable will pull. Getting this angle right reduces side-loading on the hardware over time.
Step 4: Attach the Sail and Connect Hardware
Lift the sail into place (this is much easier with two people) and connect each corner loosely with turnbuckles and shackles before tightening anything fully.
Step 5: Tension the Sail Correctly
Tighten turnbuckles gradually and evenly, moving corner to corner rather than pulling one side fully tight first. The fabric should be firm with no visible sag or fabric ripples, but not so tight that seams are under visible strain.
Step 6: Final Safety and Stability Check
Check every connection point, re-torque turnbuckles if needed, and confirm posts haven’t shifted. Look at the sail again after the first strong wind or rain event and adjust tension if it’s loosened off.
Post Installation and Anchoring Options
Using Existing Structures (Walls, Fences, Buildings)
Attaching to a house, garage, or fence can cut costs and installation time significantly. The trade-off is you’re limited by where solid structural points actually exist, and a poorly assessed wall fixing can fail under load.
Installing New Posts (Wood, Metal, Concrete Footings)
Galvanised steel posts set in concrete are the standard for durability, especially in coastal conditions where timber degrades faster. Footings typically need to be at least 600mm to 900mm deep, depending on post height, soil type, and expected wind load.
Recommended Post Height and Spacing
Most residential sails use posts between 2.4m and 3.5m high, spaced according to the sail’s dimensions and the required slope. Taller posts and wider spans need larger diameter posts and deeper footings to stay stable.
Common Installation Mistakes to Avoid
Under-Tensioning or Over-Tensioning
Too loose and the sail flogs in the wind, wearing out stitching fast. Too tight and you put unnecessary strain on hardware and seams, which shortens the sail’s life either way.
Incorrect Angle or Height Differences
Without enough slope between high and low points, rain pools in the centre and can stretch or tear the fabric. Too steep an angle can look odd and reduce actual shade coverage where you need it most.
Poor Anchor Point Strength
This is the most common (and most expensive) mistake. An anchor that looks solid but isn’t rated for wind load can fail during a storm, potentially damaging the sail, the structure it’s attached to, or anything nearby. If you’re unsure whether your sail can handle Sunshine Coast weather, it’s worth reading about how shade sails perform in strong winds before you finalise anchor points.
DIY vs. Hiring a Professional Installer
Cost Comparison
DIY installation saves on labour but adds risk if measurements, angles, or anchor strength are off. Professional installation costs more upfront but includes correct engineering for your site, proper hardware selection, and a sail that’s built to fit rather than bought off the shelf. For a full cost breakdown, see our guide on what a custom shade sail costs in Australia.
When to Call a Professional
Consider a professional if:
- You’re working with a large or custom-shaped sail
- Anchor points involve structural walls, high posts, or difficult ground conditions
- You want council-compliant documentation for approval
- You’ve had a DIY sail fail or under-perform before
If any of that sounds like your situation, it’s generally worth it to hire a professional shade sail installer rather than risk redoing the job later.
Maintenance After Installation
Seasonal Tensioning Adjustments
Fabric naturally stretches over time, especially through hot Sunshine Coast summers. Check tension every season and tighten turnbuckles as needed to keep the sail taut and shedding water properly.
Cleaning and Inspecting Hardware
Rinse fabric periodically to remove salt, dust, and grime, and check stainless hardware for corrosion, especially in coastal areas. For a full routine, our shade sail maintenance tips cover what to check and how often.
Getting the installation right from the start makes all of this easier down the track. A well-anchored, correctly tensioned sail should give you years of reliable shade with only minor seasonal adjustments.
Frequently Asked Questions
How long does a typical shade sail installation take?
A simple install onto existing structures can take a few hours, while a job needing new posts and concrete footings usually spans two days, since footings need time to cure before the sail is tensioned.
Can I install a shade sail myself, or do I need a professional?
DIY installation is possible for small, straightforward sails on solid existing structures, but larger or custom sails, tricky anchor points, or council approval requirements are best handled by a professional installer.
Do shade sails need council approval on the Sunshine Coast?
It depends on the size, height, and attachment method of the sail, as rules vary between Queensland councils. It’s worth checking with your local council or a shade sail professional before installing.